Are you constantly finding water on your car’s floor?
Did you access your vehicle’s spare tire well only to find it filled with water?
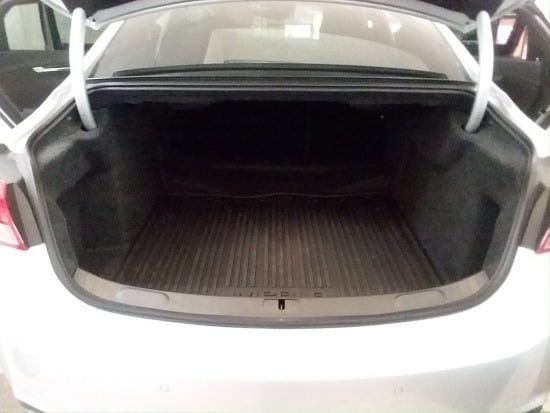
Most drivers report finding water in the trunk of their 2014 – 2018 Impala.
Surprisingly, finding the leak is somewhat stressful because the water is not coming through the obvious places like the trunk seal.
I’m here to address this problem and get to the bottom of the 2014 – 2018 Impala water in the trunk.
Fortunately, it’s not a severe problem, and you can stop the leak at home with the right tools.
After finding water in a 2014 to 2018 Chevy Impala trunk, let’s see what you can do.
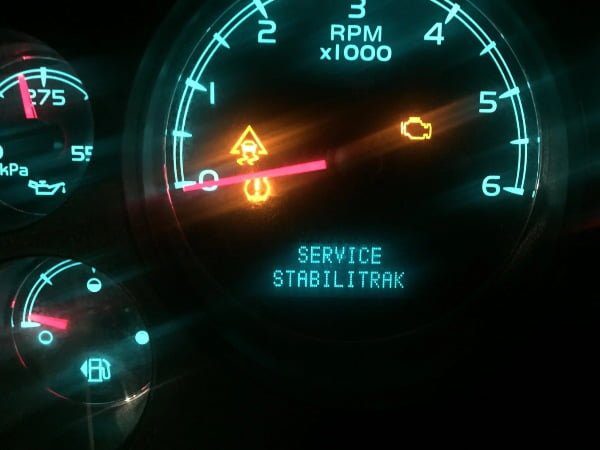
Water in the Trunk of 2014 – 2018 Impala: Why? What to Do?

Credit: commons.wikimedia.org
When water starts to leak into the trunk of a 2014 – 2018 Chevy Impala, it can go unnoticed for a little while.
The water usually drips into the spare tire wheel well that you don’t access every other day.
This water can cause rust to any emergency equipment you have, alongside a musty smell that will reach your cabin.
So, where’s the water coming from?
Well, water in the trunk of the 2014 – 2018 Impala enters through the taillight.
Over time, the taillight rubber seal tends to shrink and wear out, losing its sealing properties.
In other cases, the seal can break, allowing condensation to collect and eventually run down to the trunk bed.
You will need to replace the taillight gasket seal to stop this leak.
The procedure is straightforward, and you can do it yourself at home.
Nonetheless, you will need to buy the correct parts.
GM made new, thicker gasket seals that are intended to correct the problem.
The part number for the new gasket seal for the left taillight is 23211647 and 23211648 for the right taillight—each gasket seal costs around $13.50.
GM recognizes the water in the trunk problem in 2014 to 2018 Impala vehicles.
As such, you can order the parts directly from the dealership.
The GM dealership can replace a taillight seal if your car is still under warranty.
Otherwise, you’ll have to perform a DIY repair.
Still, you can take the car to an independent repair shop.
The average cost of repairing a water leak from a taillight is around $40. This process covers replacing the gaskets with updated parts.
Other Sources of Water in Trunk in 2014 – 2018 Impala
1. Bad seals around the trunk:
This is a rare problem, but if the leak is coming from the trunk lid, you’ll find a wet trunk lining and everything else in the trunk lid’s path.
2. Aftermarket spoilers:
If your Impala has aftermarket spoilers bolted directly on the trunk but not sealed completely, they are likely to leak water into the trunk.
3. Sunroof leak:
Impala vehicles with a sunroof have a drain pipe that runs through the trunk and drains water underneath the car. This pipe can clog and end up backing off into the trunk.
GM’s Action
GM recognized the taillight leak problem in some Chevy Impalas sold in 2014.
Therefore, the brand started a program to address this problem in 2016 at GM dealerships.
According to GM, the taillight gasket on some Chevrolet Impala vehicles from 2014 loses its ability to seal owing to heat and age.
This problem causes the water in the trunk problem in these vehicles.
Dealerships are required to repair the taillight gaskets on said vehicles and perform a trunk inspection for water damage.
GM already has a list of affected vehicles.
If yours is among those, the dealership will likely perform necessary repairs for free.
How to Replace the Taillight Gasket Seal of Chevy Impala at Home?
Replacing the taillight gasket seal is relatively easy.
I’ll take you through the process step-by-step.
You Will Need:
- Left or right gasket seals (23211647-left or 23211648-right)
- T15 Torx Bit
- 7mm socket
- 8mm socket
How To:
Step 1: Remove the Bumper
Since the taillight is integrated into the bumper, you’ll have to remove the bumper.
It has four screws in the wheel well that you’ll remove using the T15 Torx bit.
There’s also a 7mm bolt within the wheel well. After undoing the screws and bolt, pull out the bumper gently.
Step 2: Take Out the Taillight
Please take out the lining of the trunk by undoing its fasteners.
You will find four bolts that hold the taillight.
Undo these using the 8mm socket and get them off.
Next, disconnect the wire plug, and you can pull out the taillight.
You will need some elbow grease to tug at the taillight’s base since it clips on the bumper.
Step 3: Remove the Seal
Place the taillight onto a soft surface like a towel to protect the outer lens from damage.
Start peeling the seal from the bottom corner.
Pull the seal at a 45-degree angle and stretch it to remove the adhesive along with the seal.
Step 4: Clean the Taillight
Wipe the taillight with a rag and a general-purpose adhesive remover to remove any remaining adhesive, moisture, and dirt.
Step 5: Apply the New Seal
Start by placing the seal into the holes of the two outer alignment pins.
Ensure that you have the adhesive side on the lamp.
Also, center the seal onto the compression ribs —complete installation by inserting the seal through the hole of the inner alignment pin.
Step 6: Reinstall the Taillight
Reinstall the taillight assembly in reverse as you did during the removal.
You have successfully replaced the gasket seal to solve the water in the trunk problem.
Final Thoughts
2014 – 2018 water in trunk problem is quite common.
The taillight gasket seal is the cause of this issue, but it’s not a complicated process to remedy.
With the steps above, you can perform the necessary repairs and never deal with mold, musty smells, or rusty parts.
Cheers!
Read more: TR6060 vs. T56 Magnum vs. CD009 vs. TKO600